Tag: Client Onboarding
-
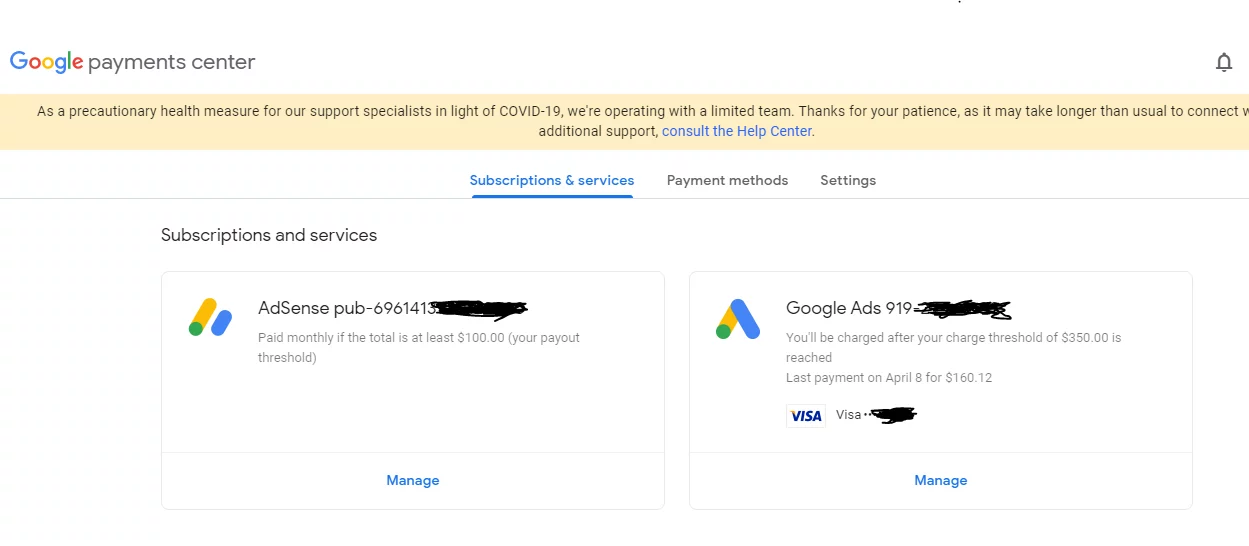
Assign Admin Access Rights of Google Payments Center to Others
Definition Google Payments Center Access Rights Prerequisite Prepare the following materials before you (as an assignor) can assign the access rights to others: Decide which Gmail Address to use Decide which Permissions to assign (Can choose more than one) Get the GMAIL Address of the Assignee Step By Step Guideline on assigning Access Rights of…
-

How to Comment in Teamwork.com
Definition Comment in Teamwork.com can be used to response any Task , SubTask or Milestone by either assignee (i.e. collaborator) or the assignor (i.e. Project Manager) of the Task. How Comment in Teamwork.com looks like What Problem Patterns the Comment solved Accessability Not only can you use the Teamwork.com interface to place the comment, but…
-
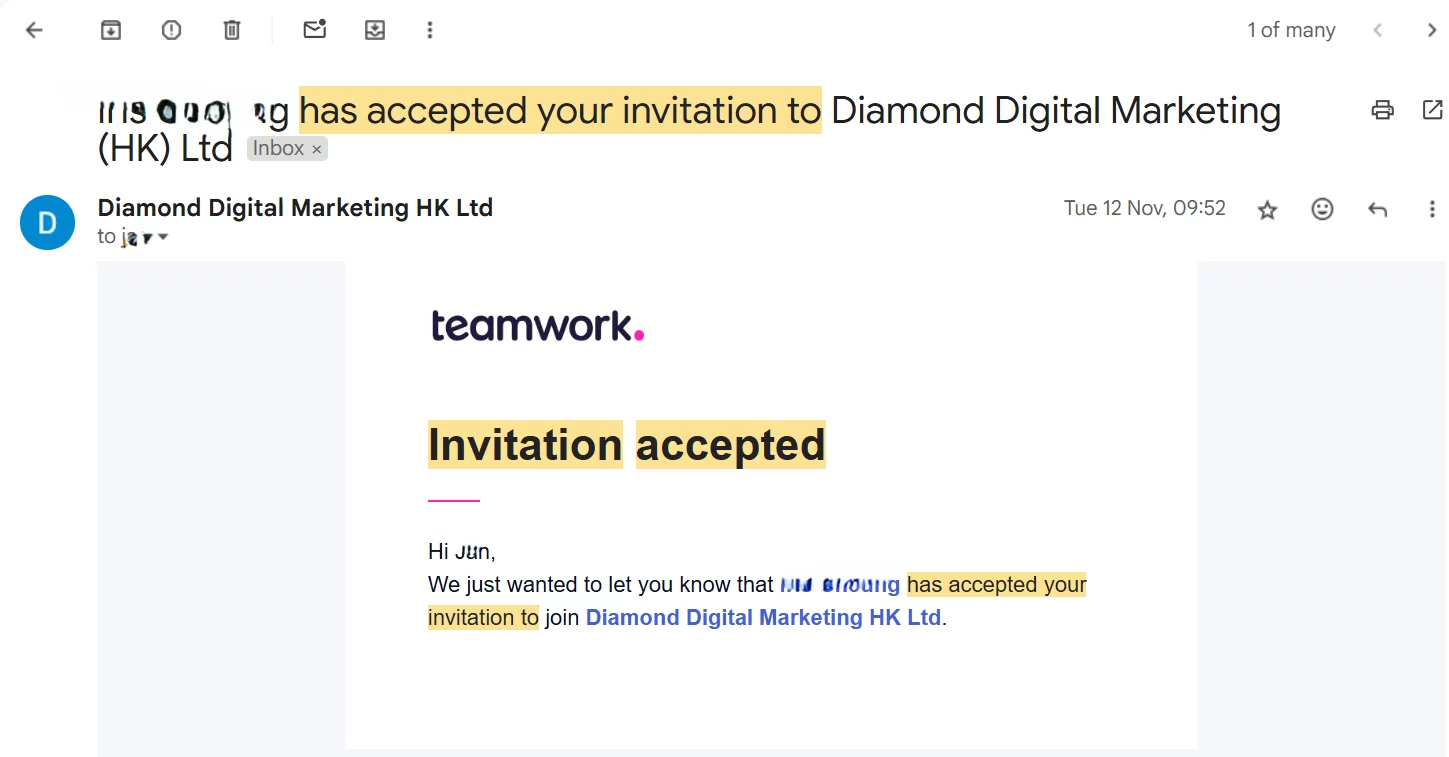
Inviting Collaborator to Join Project Management System
Definition Project Management System In DDM Group, we will adapt teamwork.com as the Project Management System, which is used by tens of thousands of orangisation in the world. Whom to Invite Administrator Supervisors or Project Managers in DDM Group will be invited as Administrator. Standard User Any non Administrator teammates but own an domain email…
-
Add a New Partner to the Business Portfolio of your Meta Business Suite
Definition Meta Business Suite Meta Business Suite (or formerly known as Facebook Business Suite) is a comprehensive Meta assets management tool designed to help businesses manage their activities under Meta Platforms, Inc. including Facebook, Instagram, Whatsapp Business and Meta Messenger from a single platform. Business Portfolio One Meta Business Suite can have many (i.e. One…
-
Google Spreadsheet Usage in Project Management
DDM
-
Google Drive Usage in Project Management
Definition Google Drive is a cloud-based file storage provided by Google which is totally free for use if the storage usage is under 15GB. You can regard it as a storage of your hard drive in your laptop, except that the storage is stationed in the Cloud instead of your laptop.. Problem Patterns that Google…
-
Project Kick Off – Client Prospective