Tag: #82678
-
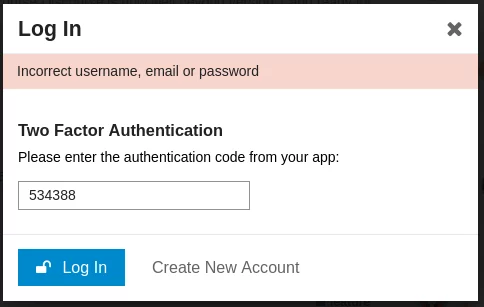
How to Enable 2FA in Facebook Personal Account
Facebook Personal Page Facebook Personal Page is one of the products under the umbrella of Meta, inc product fleet. While you can easily access your Facebook Personal Page by logging in via www.facebook.com, there are many interface from different products under Meta, inc. will drive you to the interface of Facebook Personal Page, including but…
-
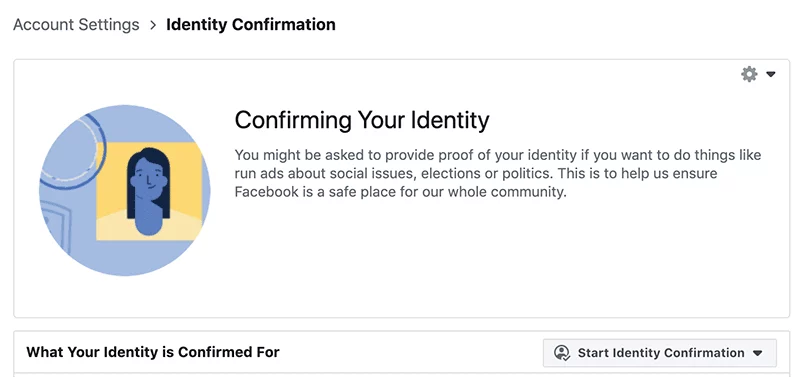
Confirm Identity for your Facebook Personal Page
Definition Facebook Personal Page Facebook Personal Page is one of the products under the umbrella of Meta, inc product fleet. While you can easily access your Facebook Personal Page by logging in via www.facebook.com, there are many interface from different products under Meta, inc. will drive you to the interface of Facebook Personal Page, including…